Setting Up Your Salespeople (Salesperson Codes)
We recommend that each salesperson is assigned a Salesperson Code to control login and other security features. Even if you have several salespeople taking turns on the same register, you can set up the window so that it’s easy to log on and off.
Salesperson Codes serve several functions:
• Define the permissions for each salesperson.
• Place limits on the dollar amounts acceptable for various payment types.
• Track sales for each salesperson.
• Provide password protection to prevent someone from performing unauthorized activities while using someone else’s Salesperson Code.
To create Salesperson Codes:
1 In the Sales module, select Options > Set Up Salesperson Security from the left navigation pane.
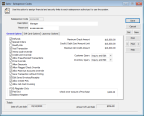
Click thumbnail for larger view of image.
2 Enter a code for the salesperson in the Salesperson Code box. The Salesperson Code identifies the salesperson and appears in Lookups and on reports. Salesperson Codes can be up to six letters, numbers, and/or special characters, for example, the salesperson’s name, or a portion of their name.
3 In the Description box, enter a description, usually the salesperson’s full name. This description helps to further identify the salesperson and also appears in some Lookups and on some reports.
4 Set the rest of the options according to the functions you want to allow for this salesperson.
For detailed information on the options in this window, see Sales Salesperson Codes window.
5 When you complete your selections in this window, select Save to keep this code.
After you define the Salesperson Codes you will use, you can choose a default code for order entry transactions (see Setting Order Entry Defaults) or for specific registers (see Setting Up Your Registers). You can also set a default salesperson when you set up each batch (see Working with Batches).
Published date: 11/22/2021